

















Mina the Hollower





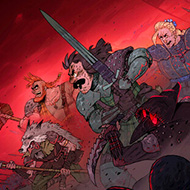
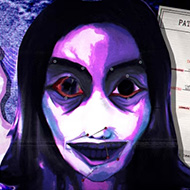
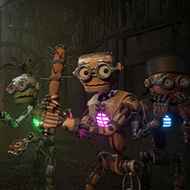


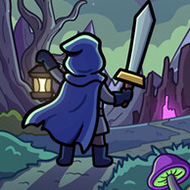
You drop through the soil beneath Ossex, come up behind a patrolling Hulk Trooper, and land three hits before it even registers where you went. That burrow-and-counter rhythm is the backbone of Mina the Hollower, and once it clicks, the rest of Tenebrous Isle starts to make sense.
| Genre | Action-adventure with Metroidvania structure |
| Setting | Tenebrous Isle, a Victorian gothic archipelago |
| Core Mechanic | Burrowing beneath danger, then striking from below |
| Typical First Run | Around 20 to 30 hours |
Burrowing Through Tenebrous Isle
Mina’s shovel-and-whip toolkit reads simple on paper: burrow, pop up, swing. In practice the game builds entire encounters around forcing you to time that pop-up against a boss telegraph instead of a wall to hide behind. Early on you’ll use burrowing mostly to skip environmental hazards, but by the time you reach Nox’s Bayou it doubles as your main way to bait ranged attackers into whiffing.
The learning curve here isn’t about memorizing patterns so much as trusting the burrow window. New players tend to burrow too early out of panic, which leaves them exposed the moment they resurface. Veterans in the game’s community talk about “burrow-baiting,” deliberately surfacing a half-second before an attack lands so the counter-hit lands clean.
Newsie in Ossex is worth talking to constantly, since the newspaper he hands out is the game’s soft quest compass. Miss it and you’ll wander regions without a clear sense of what the current headline actually wants from you.
Nightstar, Whisper and Vesper, and Weapon Choice
Five weapons anchor combat: the Nightstar whip, the twin daggers Whisper and Vesper, the Blaststrike Maul, the Guardian Casket shield, and the Battery Buster blaster. The Nightstar rewards patience and range, while Whisper and Vesper turn Mina into something closer to a rhythm-game character, chaining rapid strikes that punish hesitation.
Most players default to the Nightstar because it’s the starting weapon and it simply covers more situations. Switching to the Blaststrike Maul later changes the whole feel of boss fights, trading speed for stagger damage that can outright skip a phase transition against slower enemies.
Spark Generators and the Ossex Hub
After the first encounter with Thorne on the shipwreck shore, you return to Ossex and four Spark Generator regions open at once: Queensbury Crypt, Nox’s Bayou, Septemburg, and Bone Beach. None of them are gated in a fixed order, so the game in effect hands you a checklist rather than a hallway.
This is where build variety actually matters. Someone who commits early to burrow-heavy traversal trinkets will clear Bone Beach faster than a player who invested in raw damage, since the region leans on platforming over brute combat.
Bosses Guarding the Crypt and Beyond
- Duchess of Queensbury — the gate boss for the first Spark Generator, testing basic dodge timing.
- Nox’s Beast — guards the Swampy Generator and punishes players who never learned to burrow under wide sweeping attacks.
- Madd House — found in the Kindlewood approach to Septemburg, notorious for chaining unpredictable summons.
- Thorne — returns three times across the campaign, each round noticeably meaner than the last.
By the time you reach Radiant Manor, the game stops teaching and starts testing everything at once. The final confrontation with Baron Lionel folds together burrow timing, weapon switching, and Plasma Vial management into one multi-phase gauntlet.
Sidearms and the Underlab
Sidearms like the Drill Driver, Mist Jar, Recall Disc, and Volt Hatchet sit alongside your main weapon and get lost on death, which pushes you toward playing a little more conservatively once you’ve found one you like. The Underlab, meanwhile, is Mina’s safe zone: walk past an inactive one to light it, then burrow inside whenever you need to save or restock Plasma Vials.
A common early mistake is treating the Underlab like a fast travel point rather than a resource decision. Every rest respawns defeated enemies, so casual backtracking through a cleared area can turn into an unplanned second fight.
Secret Bosses Hidden Across the Island
Evra waits in a grave accessible only through a mini-dungeon most players walk straight past. Dark Deluxy requires two Spark Containers just to unlock the door leading to her fight, and Willis, the pirate shark hidden behind the Ossex music hall bouncer, drops the Pneumatic Armlet trinket once you throw him into his own crowd. None of these are marked on the map — they’re the kind of thing players trade tips about in the game’s Discord rather than something the manual spells out.
Can you fight every secret boss on a single playthrough?
Yes, though several require specific items like Spark Containers or full trinket sets before the encounter even becomes accessible, so most players save a handful for New Game Plus.
Does dying make you lose progress permanently?
Dying drops your current Spark Orb, which an enemy will absorb unless you defeat it or return to reclaim the orb yourself, but your Underlab checkpoint and collected trinkets stay intact.
Which weapon is best for a first playthrough?
The Nightstar whip is the safest starting pick since its range covers most early encounters, though switching to Whisper and Vesper once unlocked suits players who prefer fast, close-range trading.
Mina the Hollower asks you to treat burrowing as offense, not just escape, and the moment that shift happens the Nightstar starts feeling like an extension of your own timing rather than a weapon you’re aiming.